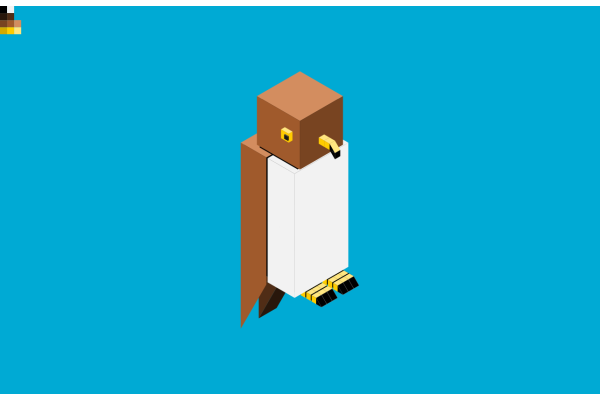
Inkscape tutorial: Eagle
The 11th prompt of Inktober is Eagle. I decided to explore the isometric projection, a common projection pattern.
Inspiration
Any projection consists of projecting a 3D shape onto a plane. Among projection methods are
- the orthographic projections which project a 3D body on the plane using orthogonal rays. The chosen plane will define the type of orthographic projection used,
- The oblique projection (as in day 8), in which the projection uses parallel rays which are not orthogonal to the plane,
- The perspective projections which use intersecting rays to represent parallels and can have 1 to 3 points of perspective.
Isometric projection is an orthographic projection in which the 3 axes appear to have the same length. Two axes are separated by an angle of 120°. This particular projection is very often seen in video games and pixel art.
While being an interesting exercise in and of itself, I was also inspired by the French board game Cubirds by Catch Up Games, in which birds are drawn with parts of cubes.
Techniques
The almighty hexagon
Isometric projection drawings will surely start in much the same way: draw a hexagon. A cube viewed in isometric projection will have the silhouette of a regular hexagon. In Inkscape, the Polygon and Stars tool (*) allows to simply draw regular polygons. Be sure to select polygons (and not stars) from the top menu and choose 6 sides. Pressing Ctrl while drawing the hexagon will allow a precise control of its orientation. For the classic isometric projection, you want two sides of the hexagon to be vertical.
Building patterns
Once you have a hexagon the right size for your drawing, you can make the three visible faces of a cube by just:
- duplicating the hexagon (
Ctrl+D), - dragging the duplicate vertically (hold
Ctrl) until two top nodes of one hexagon are superposed with two bottom nodes of the other, - intersect (
Ctrl+*) the two path to obtain a rhombus with angles 120° and 60°, - duplicate this rhombus (
Ctrl+D), and rotate it by 45° (holdCtrl) to obtain the second face, - duplicate the latter and reflect it horizontally (
H) to get the third face.
Bringing the three faces together gives you a cube pattern, which you can then use to build other solids, by duplication and addition / subtraction / intersection.
As an example, here are the basic shapes I used in my drawing:

Assembly and colors
Once the basic blocks are drawn the assembly game depends on what you want to achieve. In my case, I drew a 'skeleton' on which I added details one after the other.
When coloring the drawing, each color you use should require three shades: one lighter and one darker. Apply the lighter shade on the same faces in each volume (in my case the upper face), the base shade on another group (in my case the left face) and the darker shape on the last group (in my case the right face).
Link to the svg
The svg file is here.