Inkscape tutorial: Empty
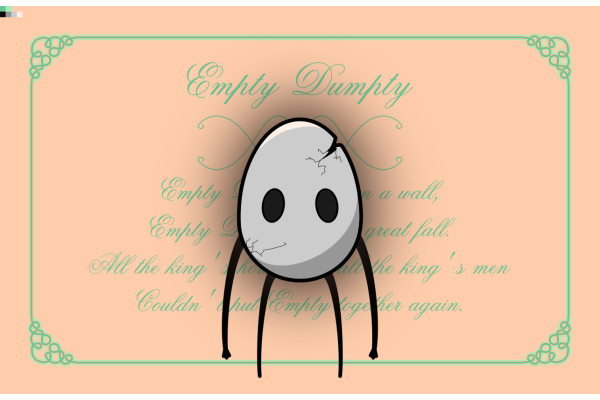
Meet Empty Dumpty, the apathetic alter ego of Humpty Dumpty. It likes nothing, nor does it dislike things. He simply stares.
Inspiration
When I read the 14th prompt, empty, my thoughts went very quickly to the lore of Hollow Knight, the video game by Team Cherry. I imagined drawing some kind of broken egg in a very dark setting.
Playing around with the word empty, I also came up with Empty Dumpty, and my plan was settled: Empty Dumpty would be an anthropomorphic egg , with a very blank stare and flabby arms.
I first drew the character taking inspiration from Hollow Knight's characters, and then imagined a way to make this character contrast with its background. I placed it in front a very fresh and joyful display of the lyrics of Humpty Dumpty, creating a discrepancy. I can only think of the song as if being played by a battered, out-of-tune music box with some sort of invading white noise when I look at this image...
Techniques
Drawing Empty
It is a very simple drawing to make. Here are the most important steps:
- To create an egg shape, draw an ellipse and a circle. Snap the circle to the ellipse's right node and (holding
Ctrl) expand the circle until it touches the left side of the ellipse. Once done, duplicate (Ctrl+D) the ellipse, subtract (Ctrl+-) it from the circle giving two moon shapes (which you can split withShift+Ctrl+K) and subtract the lower moon shape to the ellipse. You'll probably have a garbage line at the bottom, delete all those node with the Node tool (N). - The arms and legs are created with the Bezier tool (
B). The legs are just triangles with bent sides, and the arms started as such but I then added fingers with the Node tool (N). - To create the cracks, I drew the shape I wanted to remove from the egg and subtracted it (
Ctrl+-), plain and simple. I also used the Bezier tool to draw some light cracking with a very small border width. - The shadows are shapes I derived from the egg with a transparent color.
- And finally, the dark glow is simply obtained by duplicating the egg shape, putting it behind the egg (
PgDown) and giving it some blur (in theFill and Bordermenu).
Drawing the card decorations
The font I used for this card is called Old Script.
To draw an intertwined motif as on the card border, here's how I proceed:
- From the top left corner of the page I drew a first square (
R) which will be the space between the border of the page and the motif. - Then I added a second square from the bottom right corner of the first, which will determine the size of the motif.
- Using the Bezier tool, I drew the two diagonals of my square, and divided it in 4 (using division,
Ctrl+/). I only kept the left fourth of the square. - Using the Pen tool (
P) with a good amount of smoothing (50) I drew a squiggly motif inside the triangle. And with the Node tool (N) I arranged it a bit more, and I made sure the bottom of the path has a vertical handle, and the top of the path has a 45° angle (pressCtrlwhile moving the handles). - Then duplicate the motif, flip it horizontally (
H), rotate it by 90° and place it against the first motif. The two motifs should blend seamlessly together.

Once you have one corner, just duplicate and flip it to place it at the other corners. You can then draw straight lines linking the four motifs, select every path and combine them (Ctrl+K) in one single path.
To draw the light green outline I used a simple trick:
- Make two copies of the path. Color one in the background color, and the other in the outline color.
- Make the background colored path thicker than the original and place it behind (
PgDown). - Make the outlined colored path thicker than the background one and place it behind.
Link to the svg
The svg file is here.