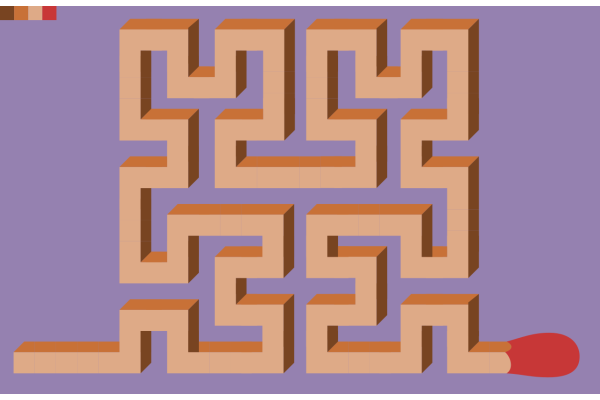
Inkscape tutorial: match
The 8th prompt is match. I went full geometrical to explore some of Inkscape's precision techniques that help achieve nicely put together shapes.

Inspiration
I had decided to work a bit on precision placement and precise shape crafting, once again inspired by Logos By Nick (this video for example) . Having settled on drawing a match in oblique projection, I decided to give it a more twisted look...
The curve that the match follows is an early iteration of the so called the Hilbert space-filling curve. It is a curve that wraps around itself and, when iterated tends towrds filling the whole unit square in a very squiggly, longer and longer path.
The procedure is to start with a simple "U" shape, and iteratively replace every turn with a more twisted version. As in day 6's drawing, it could be drawn using a L-system, namely:
Axiom: A
Rules: A=+BFF-AFFA-FFB+; B=-AFF+BFFB+FFA-
Angles: 90
Techniques
Taking a svg online
I did not draw the Hilbert curve I used for this drawing, rather I took it from Wikipedia (this file). Importing a svg file from the web is even simpler than downloading it: just display the source code from the page, copy the file content and paste it in Inkscape!
Crafting the building blocks
The Hilbert curve is all about turns. It turns in all 4 cardinal directions. In order to draw a 3D shape that follows this path, I drew six basic shapes that I would just have to alternate in the right order:
- Two segments going straight, horizontally and vertically
- Two right turns, starting vertically and horizontally
- Two left turns, starting vertically and horizontally
I used the oblique projection to draw those elements, which means that I have a front side, an upper side and a right side. The upper and right side are slanted by an angle of 45°.
I based all those blocks on a square with appropriate dimensions, and duplicated this square, intersected, subtracted, added copies in order to build the blocks.

Note that I used very distinct colors: green for the front, blue for up and red for the side. And the blocks are semi-transparent, which really helps placing them.
In order to make a 45° angle, I had to rotate a square by the right amount. Here,pressing Ctrl while rotating clips the rotation to multiples of 15°, which is very handy.
Assembling the blocks
Once the six basic blocks are drawn, it is a simple game of following the curve with the appropriate turns. I used again a helping trick to keep everything aligned: pressing Ctrl while dragging an object will guarantee that is it only shifted horizontally or vertically.
That way, if I want to be sure that two distant blocks are aligned, I place one block on top of the other, align them, and then pressing Ctrl I move the block to where I want, keeping the alignement throughout.
Link to the svg
The svg file can be found here.